28 August 2011
Extra Dessert Delights Apple Pie Gum
This summer, I've been struggling with my desire to eat nothing but peanut butter milkshakes (and Peanut Buster Parfaits, and Tin Roof Sundaes, you get the idea!). I've been able to maintain my weight all summer, but nothing has been happening on the weight loss front. Instead of getting frustrated, I've been trying to nudge some of the bad habits I've picked up in the summer back to healthier habits. I saw this gum in the checkout aisle last week and decided to give it a try since I'm a fan of the Extra Dessert Delights Mint Chip ice cream gum. I'm glad I took a chance, because I'm now a big fan of this Apple Pie Gum! I know it sounds weird, and I have to say, it is a little weird, but it tastes like apple pie! It's just enough to take the edge off of a sugary dessert craving. I do have to say that after about one minute, the taste starts to wear off a little and it gets a little blah, so it's not a gum you want to pop in your mouth to give it something to do for a while, just for a quick taste of sweetness. Now Extra just needs to invent a peanut butter milkshake flavor and I'll be all set!
23 August 2011
Summer
Oh my blog, how I have missed you! I started this blog because I love food and I love to write. Somewhere along the way, I lost my focus. My blog started to feel like a burden. I felt I had to compete with all of the other food blogs who took way better pictures and devoted so much time researching the backgrounds of foods and experimenting with kitchen techniques I could never compete with. I started gaining weight and felt like a fraud writing about the French way of eating. I felt I needed to update everyday with new recipes, yet my health and waistline were not happy with all of that food. I needed to take a step back from my blog for a while.
During my blog hiatus, I joined Weight Watchers and rediscovered my joy of healthy eating. I am 35 lbs down from where I was a year ago at this time and feel like I have rediscovered my joie de vivre. For me, my food blog isn't about competing to make the most decadent dish and take the best pictures, it's about relating my joy of preparing healthy food for my family in its simplicity. I realized I didn't have to compete with all of the amazing and wonderful blogs out there. My blog is about my joie de vivre and a way to express myself creatively and at the end of this journey of self discovery, I think that is pretty wonderful.
For my friends and readers who have been gently (and sometimes not so) prodding me to update and post again, you will be seeing me here more often. I can't always promise a fabulous recipe and I definitely can't promise fabulous mouthwatering pictures, but I can promise that I'll write about things, food, and experiences where I find joy.
During my blog hiatus, I joined Weight Watchers and rediscovered my joy of healthy eating. I am 35 lbs down from where I was a year ago at this time and feel like I have rediscovered my joie de vivre. For me, my food blog isn't about competing to make the most decadent dish and take the best pictures, it's about relating my joy of preparing healthy food for my family in its simplicity. I realized I didn't have to compete with all of the amazing and wonderful blogs out there. My blog is about my joie de vivre and a way to express myself creatively and at the end of this journey of self discovery, I think that is pretty wonderful.
For my friends and readers who have been gently (and sometimes not so) prodding me to update and post again, you will be seeing me here more often. I can't always promise a fabulous recipe and I definitely can't promise fabulous mouthwatering pictures, but I can promise that I'll write about things, food, and experiences where I find joy.
14 November 2010
Savor the Flavor
Thanks to the Foodbuzz Foodie Correspondent Program, I was able to attend Savor the Flavor yesterday as a member of the media. Savor the Flavor is a food and cooking show put on by Taste Tri-Cities as a benefit for Modern Living Services which services and supports developmentally disabled adults in the community.
As a member of the press, I was able to get into the show early to examine the layout, talk to vendors and watch the amount of effort it takes to pull a show like this off.
I was impressed with the layout of the show. There were 5-6 stages set up within the space, the aisles were roomy yet there were little seating areas throughout where people could enjoy wine and nibbles. There were lots of local food vendors and establishments represented as well. I learned about quite a few local food sources that I was unaware of before. My favorites were locally canned salmon which was caught on a line by fishermen in Washington, a woman who was selling natural dog chews made from naturally shed local elk antlers, as well as all of the small businesses who were out there working hard for their living.
This man had a small cheesecake business that he had just started this year before the start of the Farmer's market season. He was baking his cheesecakes out of the Pasco Specialty Kitchen which is a business that has an industrial kitchen it rents to small food businesses to help them get started.
Once the show officially opened, I was caught up in the excitement of the cooking demonstrations. The first I attended was Chef vs. Chef, a local take on The Iron Chef featuring local chefs. It was incredibly charming. Of the first two chefs, one was the head chef from a local retirement community and the other was a chef of a local restaurant. Being first up, they were a little flustered, but incredibly professional and polite to their sous chefs and each other. I was tickled that the first two front rows were taken up by the chef's family members cheering them on. I was so enthralled by the Chef vs. Chef competition that I watched two of them throughout the day. Here are some of the chef's finished dishes after 40 minutes.
With these two, the secret ingredient was beef loin. I thought the long, deep fried sweet potato strips were inspired!
Secret ingredient: White salmon. I felt so sorry for the sous chef who helped make the above dish. They didn't really have sinks, so he had to carefully drain the pasta into a small bowl. Talk about pressure!
After Chef vs. Chef, it was getting to be about lunch time. Savor the Flavor is all about trying out dishes from different restaurants. You buy tickets for a dollar each and then use the tickets to purchase little sample dishes from attending restaurants.
As a member of the press, I was able to get into the show early to examine the layout, talk to vendors and watch the amount of effort it takes to pull a show like this off.
I was impressed with the layout of the show. There were 5-6 stages set up within the space, the aisles were roomy yet there were little seating areas throughout where people could enjoy wine and nibbles. There were lots of local food vendors and establishments represented as well. I learned about quite a few local food sources that I was unaware of before. My favorites were locally canned salmon which was caught on a line by fishermen in Washington, a woman who was selling natural dog chews made from naturally shed local elk antlers, as well as all of the small businesses who were out there working hard for their living.
This man had a small cheesecake business that he had just started this year before the start of the Farmer's market season. He was baking his cheesecakes out of the Pasco Specialty Kitchen which is a business that has an industrial kitchen it rents to small food businesses to help them get started.
Once the show officially opened, I was caught up in the excitement of the cooking demonstrations. The first I attended was Chef vs. Chef, a local take on The Iron Chef featuring local chefs. It was incredibly charming. Of the first two chefs, one was the head chef from a local retirement community and the other was a chef of a local restaurant. Being first up, they were a little flustered, but incredibly professional and polite to their sous chefs and each other. I was tickled that the first two front rows were taken up by the chef's family members cheering them on. I was so enthralled by the Chef vs. Chef competition that I watched two of them throughout the day. Here are some of the chef's finished dishes after 40 minutes.
With these two, the secret ingredient was beef loin. I thought the long, deep fried sweet potato strips were inspired!
Secret ingredient: White salmon. I felt so sorry for the sous chef who helped make the above dish. They didn't really have sinks, so he had to carefully drain the pasta into a small bowl. Talk about pressure!
After Chef vs. Chef, it was getting to be about lunch time. Savor the Flavor is all about trying out dishes from different restaurants. You buy tickets for a dollar each and then use the tickets to purchase little sample dishes from attending restaurants.
This was a mini beef sandwich with coleslaw from Jacksons, a local sports bar
12 cheese Macaroni and Cheese from Cheese Louise, a local cheesemonger
Thai spring rolls. One of my favorite nibbles of the day!
After my nibbles for lunch, I was starting to wear out so I headed over to the "celebrity" chef stage to watch the demos over there. The first was a chef from a local country club. There were only about 25 people watching his show so there was lots of opportunity to ask the chef questions. He was extremely personable and promised to e-mail me his recipes. I can't wait to try making his hazelnut chocolate truffle tart with spiced cranberries.
In addition to his chocolate truffle tart, he made short ribs with mushroom risotto
A sample of the lobster mushroom he used in his risotto. It had a bright red outside!
The last "celebrity" chef show I attended for the day was a local chef who owns a Thai restaurant called Emerald of Siam. She has published two cookbooks now which she sells at her restaurant. I bought one of them yesterday because it had the recipe for tom yum (lemongrass with shrimp) soup which she demoed.
This was my favorite nibble of the day! With my sore throat, it felt so nourishing.
Savor the Flavor was a wonderful experience and a wonderful way to discover local food sources and restaurants who are using thoughtful, loving, local and sustainable practices toward food and food production. My only complaint about the show was the inclusion of non-food vendors such as a local hair salon, as well as vendors selling bags, make-up and home fragrances. These really detracted from an otherwise fabulous event.
04 November 2010
02 November 2010
Healthy Halloween dinner
It's November already! I thought I'd share a quick post today before this post became too outdated.
My goal this Halloween was to make a high protein, low sugar, healthy dinner to fuel my kids before the onslaught of post trick-or-treating sugar. I had help from a Pillsbury Halloween magazine I picked up a few years ago. Fortunately, they included all of the nutritional information on the recipes. So many of those magazines don't.
Twice baked mummies
These were baked potatoes, cut in half with their insides scraped out. I filled the cavity with cooked turkey meatball that had simmered in pizza sauce, laid mozzarella "bandages" over the meatballs, popped them back into the oven for a minute or two so the cheese could melt slightly, and then added green olives for the eyes and pickle slices for feet.
Jack o' lantern smoothies
This was a smoothie made with nonfat greek yogurt, orange juice concentrate, mandarin oranges, nonfat milk, and banana. I added orange food coloring to really make it orange. The faces were made with melted chocolate chips and were spread inside the glass. I then chilled the glasses to set the chocolate faces before filling.
"Garbage" dip
This was a dip made with nonfat greek yogurt, cream cheese and a whole bunch of veggies. I served this with a plate full of raw veggies. The kids loved the "hand" sticking out of the dip.
Fueling up before heading out.
26 October 2010
Brown Rice Pilaf with pecans and dried cranberries
Have you already started planning your side dishes for Thanksgiving? Do you have set standards or are you an adventuresome type? I like to try different side dishes every Thanksgiving. I have my set favorite, my mom's stuffing, but I'm even going to mix that up this year and try to make it healthier in consideration for a diabetic in the family who is coming to dinner.
I made this Brown Rice Pilaf with pecans and dried cranberries to accompany the turkey made for my review of the Charbroil Big Easy. I adapted it from a recipe by Lorna Sass in her cookbook, Whole Grains: Every Day, Every Way. I really liked the nuttiness and the whole grains, but I think when I make it again, I will cut out the butter. The recipe calls for 3 Tbls. of butter which I used because it was my first time making the recipe, but it really didn't need it. I think the butter made the dish taste a little heavy, especially since we already had all of the heavy aromas around the house from the turkey. Either way you make it though, it could be your solution on what to make to accompany your Thanksgiving turkey this year!
Brown rice pilaf with pecans and dried cranberries by Joie de vivre. Adapted from Whole Grains: Every Day, Every Way by Lorna Sass
Serves 4-6
Ingredients:
3 Tbls. unsalted butter (I'm going to omit this the next time I make it)
3/4 tsp. salt
1/4 tsp. pumpkin pie spice
1/2 c. chopped pecans
3 c. freshly cooked long grain brown rice (I made this in my rice cooker while the turkey was cooking)
3 Tbls. sweet sherry
2 Tbls. dried cranberries
3/4 tsp. grated orange zest
Salt and pepper to taste
Directions:
1. Heat the butter in a large skillet until melted and foamy. Add the salt, pumpkin pie spice, and the chopped pecans. Stir for 2-3 minutes until the pecans are slightly toasted.
2. Add the rice and stir until combined. Next, add the cranberries, sherry and orange zest. Stir until combined.
3. Remove from heat and adjust the salt and pepper to taste.
20 October 2010
Review of Ghirardelli Luxe Milk Chocolates
As part of the Foodbuzz Tastemaker Program, I was recently sent some samples of Ghirardelli Luxe Milk Chocolates to try. (I know, it's a hard job, but someone has to do it!) Fortunately for me, they came the day before I was to set out on a relaxing weekend at a women's retreat. What better place or time to try some new chocolates than on a weekend retreat?
Saturday morning dawned warmish and beautiful. The forecast called for rain all weekend so I was delighted to find a sunny spot all to myself where I could ready my book and try these new chocolates.
I settled into a nice adirondack chair which was bathed in sunlight, beautiful Lake Coeur d'Alene (in Idaho) shimmered in the distance, popped my iPod buds into my ears, took a deep, relaxing sigh, and tried these chocolates.
For milk chocolate, these were surprisingly good. I am really a dark chocolate fan, the darker the better, so I'm not the best person to be reviewing these, but I did enjoy them. The milk chocolate was extremely smooth and actually melted on my tongue unlike some milk chocolates that don't melt and leave a waxy coating in your mouth. The nut flavors, almond and hazelnut, were also very good. They had nice pieces of nut in them that actually tasted nutty and complemented the chocolate nicely. Another bonus, small sizes make for instant portion control.
If you are a fan of milk chocolate, go ahead and give these a try, I think you'll like them.
19 October 2010
Pumpkin Buckwheat Breakfast
I got a bee in my bonnet this week for eating pumpkin for breakfast after reading a post by Josie at The Skinny Way of Life where she put pumpkin in her oatmeal. I had never even thought of eating pumpkin in this way before, but the idea of adding it to whole grains for breakfast really resonated with me. I started rifling through my grains and came across a neglected bag of raw buckwheat groats. Why has it been neglected you ask? I am not a fan of buckwheat, it is just a little too earthy for me. However, I thought if I add pumpkin to it, perhaps it would mask the earthy smell! I soaked the buckwheat groats overnight in a saucepan and in the morning, they were ready to eat after cooking for a short 10 minutes. After adding the pumpkin, a little honey, and some pumpkin pie spice, my breakfast was good to go. Pouring nonfat milk over the top made the whole dish creamy and yummy. It was like eating pumpkin pie for breakfast! My new favorite way to eat whole grains for breakfast.
Pumpkin Buckwheat Breakfast by Joie de vivre
(Serves 1)
Ingredients:
1/4 c. raw buckwheat groats
1/2 c. water
1/2 c. canned pumpkin
1/2 tsp. pumpkin pie spice
2 tsp. honey
1 c. nonfat milk
1 tsp. flaxseed oil (optional)
Directions:
1. Soak the buckwheat groats in the water overnight in a small saucepan with a lid.
2. In the morning, remove the lid and place the saucepan over high heat. Bring the water to a boil, then place the lid on the pan and lower the heat to low. Gently simmer for 10 minutes.
3. After 10 minutes, remove the pan from the heat. Check to see that all of the water has been absorbed by the groats. If not, put over low heat until the water has been absorbed. Leave the lid on the pot so the groats can steam while you get the other ingredients put together.
4. Into your breakfast cereal bowl, add 1/2 pumpkin. Add the pumpkin pie spice and the honey and mix together. If desired, add the flaxseed oil.
5. Mix the pumpkin, honey and flaxseed oil together and then add the cooked buckwheat.
6. Mix the buckwheat and the pumpkin mixture together and pour milk over it as desired. Enjoy.
My week in food
Although I had a good week in food, my photos are pretty weak this week (hee hee). I was able to go on a women's retreat last weekend in Coeur d'Alene, ID which was BEAUTIFUL and completely relaxing, but I somehow forgot to take pictures of my food which is how it should be when you're relaxed.
Breakfasts
Lunches
Breakfasts
Oatmeal with 1/2 smashed banana, 1 c. nonfat milk, coffee and cream
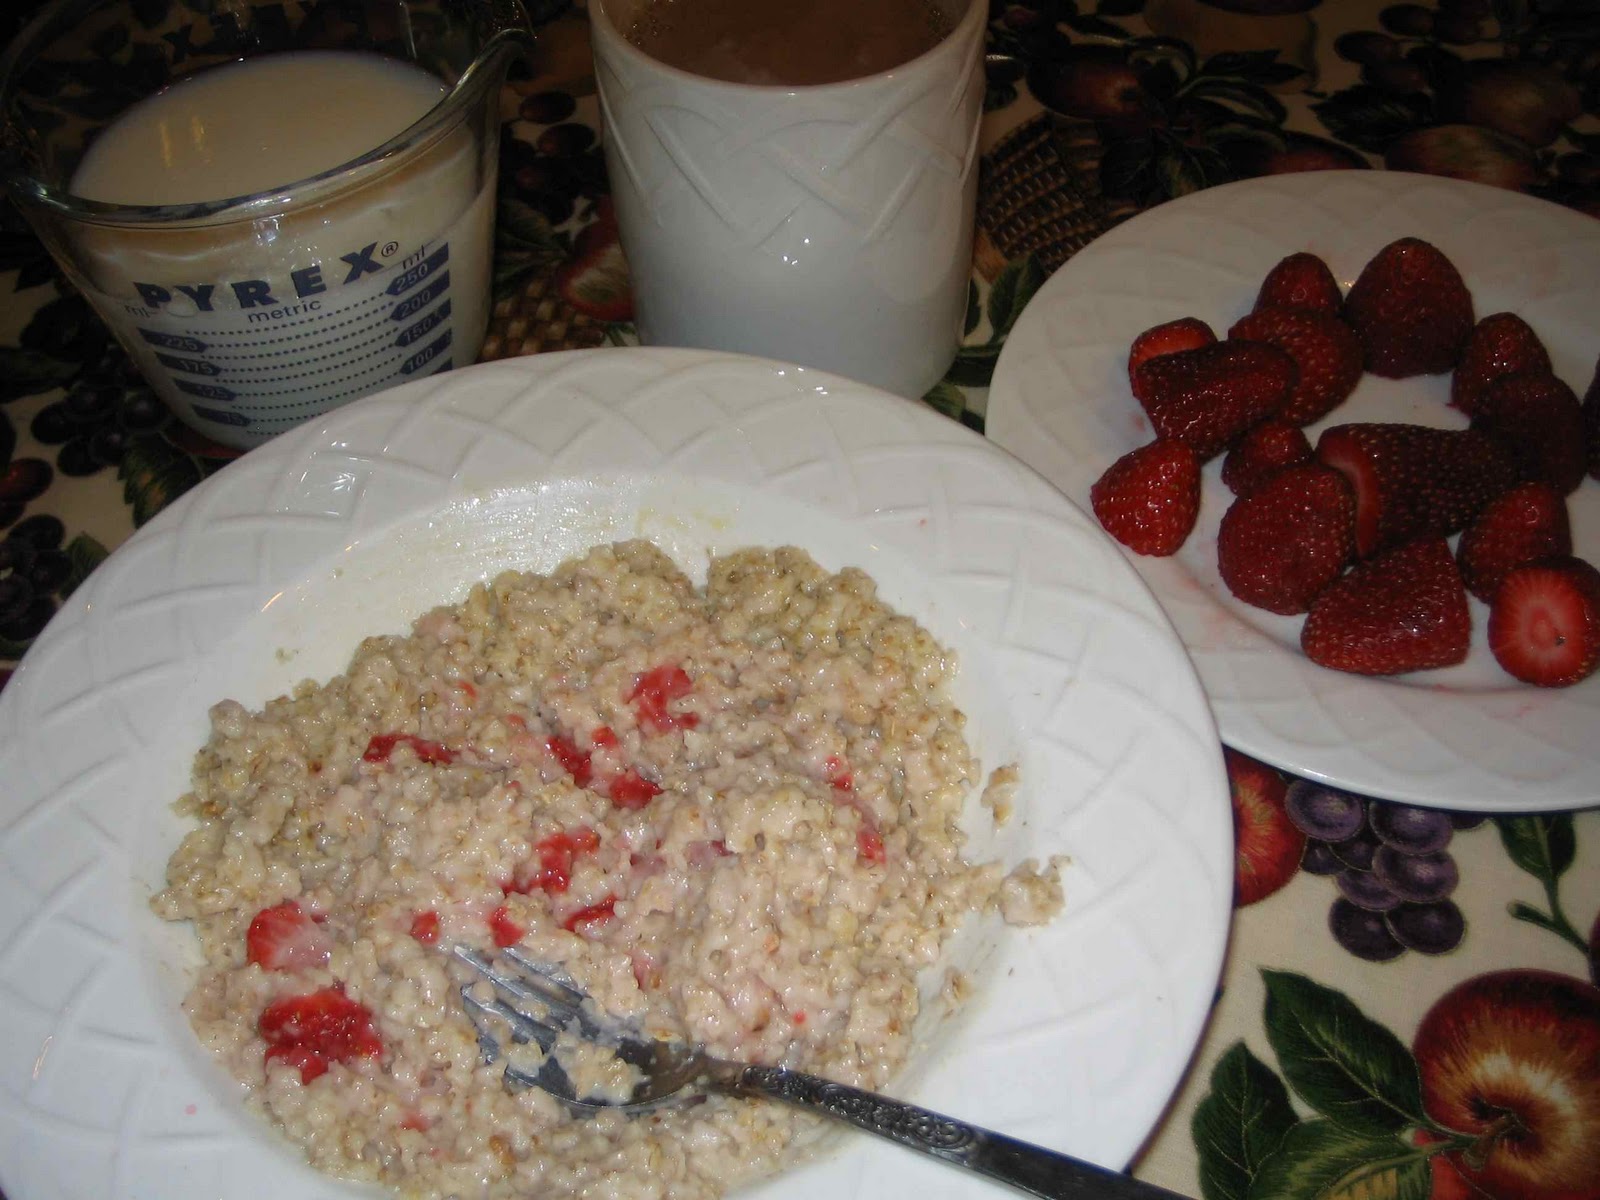
Oatmeal with 1 1/2 c. sliced strawberries (a few smashed in my oatmeal too), 1 c. nonfat milk, coffee and cream
This tasted like pumpkin pie for breakfast! I'll post the recipe next. 1/4 c. dried buckwheat (cooked) with pumpkin, honey, pumpkin pie spice. 1 c. nonfat milk, coffee and cream.
Same breakfast as above, but made with 1/4 c. dried teff (cooked) instead of the buckwheat
Lunches
1/2 can salmon, whole grain crackers, 1/2 c. plain yogurt, 1 1/2 c. sliced strawberries
2 fried eggs, 1 piece of whole wheat toast spread with Marmite, 1 1/2 c. sliced strawberries, 1/2 c. plain yogurt.
Turkey sandwich with mustard on whole wheat bread, zucchini sticks
1 fried egg, 1 piece of whole wheat toast spread with Marmite, 1/2 apple sliced thinly, zucchini sticks, 1/2 c. lowfat cottage cheese
1/2 c. plain yogurt, 1 tin of sardines packed in water, 8 whole grain crackers, 1/4 c. pomegranate seeds
Dinners
4 oz. plain baked potato, 1/2 c. sauteed mushrooms, steamed broccoli with 1 tsp. butter, 3 oz. London broil
How to open a pomegranate
It's pomegranate season! I remember buying pomegranates as a kid at our local flea market near Fresno, CA. I used to spend HOURS carefully peeling back all the membranes in the pomegranate to eat the seeds one by one. As an adult, I still love pomegranates, but no longer have the time or the desire to spend hours eating one. The problem is, those suckers are hard to open without making a mess and crushing all of those beautiful juicy seeds inside! A few years ago, I happened upon this method of opening them. I can go from pomegranate to a bowl full of seeds in less than 5 minutes. Oh yeah!
1. First, cut off the top and the bottom of the pomegranate using a very sharp knife.
2. Next, cut a shallow slit down the side of the pomegranate. You need only cut through the outside of the pomegranate.
3. Fill a large bowl with water and place the pomegranate into the bowl. While the pomegranate is under the water, wedge your fingers in the slit you made with your thumbs on the opposite side of the fruit and split the pomegranate in two. Continue to split the fruit into about six pieces.
4. Once the pomegranate is broken up into about six pieces, gently start to separate the seeds from the rind and the membrane. I usually just rub the pomegranate pieces between my fingers and thumbs and the seeds come off easily. Do this step gently, you don't want to crush the seeds.
5. You will notice that the seeds sink to the bottom of the bowl while the rind and the membranes of the pomegranate float. When you are finished deseeding the pomegranate, use a strainer to skim off all of the floating rind and membrane. Empty your strainer, then pour the water and the seeds into it. You now have a strainer full of pomegranate seeds you can do what you wish with.
I served my pomegranate seeds in a little bowl to accompany my lunch yesterday. (Yes, I really do eat sardines on crackers). I love scooping up the pomegranate seeds on a spoon. Easy peasy! You can do it too. Once you get the technique of opening pomegranates down, you can spend the few precious weeks in fall while they are in season enjoying them.
1. First, cut off the top and the bottom of the pomegranate using a very sharp knife.
2. Next, cut a shallow slit down the side of the pomegranate. You need only cut through the outside of the pomegranate.
3. Fill a large bowl with water and place the pomegranate into the bowl. While the pomegranate is under the water, wedge your fingers in the slit you made with your thumbs on the opposite side of the fruit and split the pomegranate in two. Continue to split the fruit into about six pieces.
4. Once the pomegranate is broken up into about six pieces, gently start to separate the seeds from the rind and the membrane. I usually just rub the pomegranate pieces between my fingers and thumbs and the seeds come off easily. Do this step gently, you don't want to crush the seeds.
5. You will notice that the seeds sink to the bottom of the bowl while the rind and the membranes of the pomegranate float. When you are finished deseeding the pomegranate, use a strainer to skim off all of the floating rind and membrane. Empty your strainer, then pour the water and the seeds into it. You now have a strainer full of pomegranate seeds you can do what you wish with.
I served my pomegranate seeds in a little bowl to accompany my lunch yesterday. (Yes, I really do eat sardines on crackers). I love scooping up the pomegranate seeds on a spoon. Easy peasy! You can do it too. Once you get the technique of opening pomegranates down, you can spend the few precious weeks in fall while they are in season enjoying them.
13 October 2010
Review of The Char-broil Big Easy
As part of the Foodbuzz Tastemaker Program, I was sent a Char-broil Big Easy Oil-less turkey fryer to review as well as a Flip video camera to record my experience! I hope you find the video charming, it was recorded primarily by my 5 year old, he was the only one available at the time, so bear that in mind.
I was really excited by The Big Easy. All I did to my turkey was remove the insides, rinse the inside and the outside of the bird with water, dry it, let it rest at room temperature for an hour, smear it with softened butter, season it liberally with Charbroil's All Purpose Rub, pop it in the hinged basket and pop it in The Big Easy. I didn't have to baste, I didn't have to constantly worry about it, that was it. An hour and a half after putting the turkey in, I had one of the juiciest, most flavorful turkeys I had ever had. Even the leftovers are juicy!
As my loyal reader, you can get in on the action too! Charbroil is giving you free shipping on The Big Easy at charbroil.com. Plus, you can also take advantage of an exclusive offer of 10% off the Hinged Basket when you enter offer code TBEFB12 at time of checkout. The Big Easy is available for immediate purchase nationwide at Lowe’s, The Home Depot, Amazon.com and Bass Pro Shops.
Subscribe to:
Posts (Atom)


